Battery Knowledge
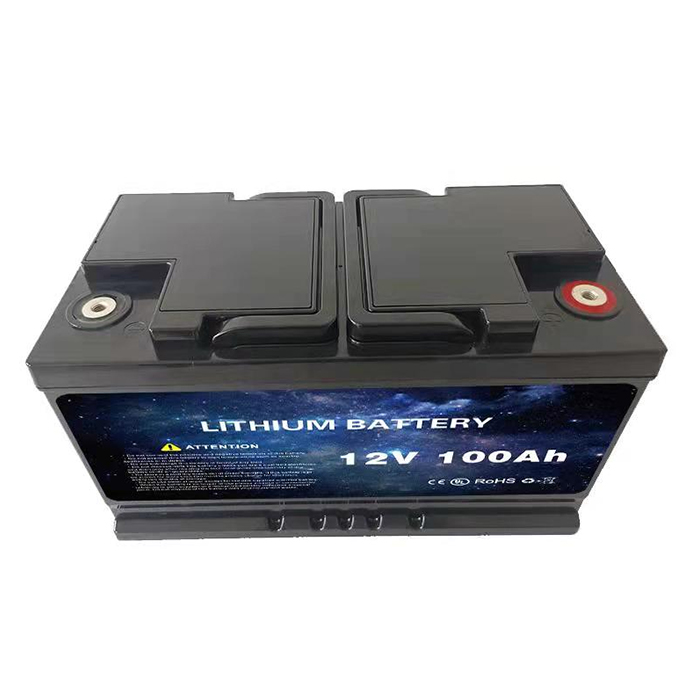
A Marine Battery needs enough water protection for its actual location and exposure, but most installations should keep the battery dry rather than rely on it to survive submersion. Before buying, check the product rating, the protection of its terminals and connections, and the requirements in the manufacturer's manual. MATELION recommends choosing protection for the whole installation, not just the battery case.
An IP rating describes protection against solids and water under specified test conditions. The first digit relates to solids; the second relates to water. An X means that digit has not been stated or tested. For example, IPX7 describes a water-ingress test but does not state a solids-protection level.
IPX4: Tested for splashing water from different directions. This may suit a protected area where occasional splashes are possible, if the manufacturer approves the installation.
IPX5: Tested against water jets. This can be relevant where washdown spray may reach equipment, but it does not mean the battery can be submerged.
IPX6: Tested against more powerful water jets than IPX5. Check the product documentation for the exact test conditions and limitations.
IPX7: Tested for temporary immersion under specified conditions, commonly up to 1 meter for 30 minutes. It does not prove that a battery is suitable for ongoing immersion, saltwater exposure, or use with wet terminals.
IP68: The manufacturer defines the immersion depth and duration. Ask for those details rather than assuming all IP68 products provide the same protection.
IP ratings are based on defined test conditions. A rating does not automatically cover cables, connectors, vents, external fuses, or a battery after it has been modified or installed. Confirm exactly which parts of the assembly the rating applies to.
There is no single waterproof rating that fits every boat. Start with the position of the battery and the kind of water that could reach it.
Protected, dry battery compartment: Prioritize a secure, properly sized installation, corrosion-resistant connections, and the protection stated in the battery manual. A higher immersion rating may not be necessary.
Bilge-adjacent or low location: Consider the realistic risk of standing water, spray, and flooding. Keep the battery above expected water levels where possible and use an approved enclosure or relocation plan.
Open deck or exposed locker: Check exposure to rain, spray, washdown, and direct sun. Choose a product and enclosure approved for those conditions, and make sure water cannot collect around terminals.
Area that may flood or become submerged: Do not assume an IP rating makes the battery safe to operate underwater. Follow the manufacturer and boat builder's guidance, and place the battery outside likely flood zones whenever possible.
Buyers often compare a headline rating but need to know whether water can enter through the terminals, cable openings, caps, vents, or accessory connections. Ask the seller or manufacturer to identify the tested parts and any installation limits. A waterproof-looking case does not establish that every electrical connection is protected.
Water protection is only one part of choosing a Marine Battery. Confirm that the battery is intended for the boat's electrical system and its starting, deep-cycle, or dual-purpose use. Also check vibration resistance, mounting orientation, charging compatibility, temperature limits, required ventilation, and warranty conditions. A water rating cannot confirm these other requirements.
Salt spray can accelerate corrosion on terminals and connectors even when water does not enter the battery case. Protect connections using methods approved by the battery manufacturer and inspect them regularly. Do not seal a battery into an airtight box unless its documentation explicitly permits that arrangement. Lead-acid batteries may require ventilation, and lithium batteries have specific charging and temperature limits that must be followed.
Step 1: Identify the battery's job. Record whether it will start an engine, power house loads, or do both. Confirm the required voltage, capacity, chemistry, and charging system before comparing water protection.
Step 2: Map the installation position. Note whether the battery will be in a cabin, locker, bilge-adjacent space, or exposed area. Check whether the location is above or below likely water levels and whether it can drain.
Step 3: List the water exposure. Decide whether the battery may encounter condensation, occasional splashes, rain, washdown jets, standing water, or possible submersion. Do not treat these conditions as interchangeable.
Step 4: Read the product documentation. Look for the IP rating, the exact parts covered, permitted mounting orientation, terminal protection, ventilation requirements, and any warning against immersion or washdown.
Step 5: Protect the installation as a system. Check the enclosure, cable glands, connectors, fuse holder, switches, and charging connections. Use components suitable for the same environment and install them as instructed.
Step 6: Compare the real risk with the specification. Choose a battery and installation that meet the expected exposure without treating a high IP rating as permission to place the battery where flooding is likely. If the documentation is unclear, get written guidance from the manufacturer before purchase.
If the battery stays in a dry, protected compartment, focus on correct fit, secure mounting, compatible charging, and protection from corrosion.
If splashes or washdown spray can reach the location, verify that the battery and every exposed connection are approved for that exposure.
If standing water is possible, reduce the hazard by relocating or raising the battery and improving drainage. Do not rely on the battery rating alone.
If submersion is possible, ask the manufacturer whether the exact product and installation are rated for the expected depth and duration. If there is no clear approval, choose another location or product.
Use tools that fit the battery and boat installation. Follow the battery manual and applicable marine electrical requirements, and consult a qualified marine technician if you are unsure about wiring or protection.
Battery and installation manuals, plus the boat wiring diagram.
Eye protection and gloves appropriate for the battery chemistry and work area.
Insulated hand tools sized for the battery terminals and mounting hardware.
A digital multimeter for checking voltage and confirming electrical conditions.
A flashlight and a clean, dry cloth for inspecting the compartment and connections.
A compatible battery box, hold-down, or mounting hardware if required by the manufacturer.
Marine-rated cables, terminals, fuse, fuse holder, and connectors specified for the installation.
Manufacturer-approved terminal protection and corrosion-control materials.
Labels or a camera to record cable positions before disconnecting an existing battery.
Do not select a fuse, cable size, sealant, or protective coating by guesswork. Use the system design and product instructions. Disconnect power safely before working, prevent tools from bridging terminals, and keep flames and sparks away from batteries that may release flammable gas.
Step 1: Make the work area safe. Switch off connected equipment and charging sources according to the boat and battery instructions. Ventilate the area as required, keep ignition sources away, and use suitable protective equipment.
Step 2: Inspect the compartment. Look for standing water, leaks, poor drainage, damaged wiring, sharp edges, heat sources, and signs of corrosion. Correct the cause of water entry before installing the battery.
Step 3: Confirm fit and orientation. Make sure the battery sits in the permitted position, cannot shift under vibration, and has the clearance and ventilation required by its manufacturer. Keep it away from likely water accumulation.
Step 4: Secure the battery and connections. Use an approved hold-down and correctly sized cables and connectors. Keep terminals protected from accidental contact and route cables to reduce strain, chafing, and water tracking along the cable.
Step 5: Check the protection around openings. Confirm that cable entries, covers, and any enclosure seals are installed as specified. Do not block vents or add sealant where it could trap gas, heat, or moisture.
Step 6: Reconnect and verify. Follow the specified connection order and polarity. Use a multimeter to check the system as appropriate, then confirm that charging equipment is configured for the battery chemistry.
Step 7: Test and record. Check for movement, loose connections, abnormal heat, warning indicators, and signs of water entry. Record the model, rating, installation date, and inspection findings for future maintenance.
Inspect the compartment and exposed connections after an event that may have introduced water or vibration. Look for pooled water, corrosion, loosened hold-downs, damaged insulation, cracked cases, and moisture inside covers. If water has reached the battery or electrical connections, stop using the system if it is unsafe and follow the manufacturer's inspection or service instructions.
An IP test applies only to stated conditions and duration. It does not mean a battery can stay underwater, withstand every depth, or remain safe after damage. Check the exact test and the manufacturer's operating guidance.
A case rating may not include terminals, cables, fuse holders, chargers, or connectors. Review each component and protect the full circuit for its actual location.
Some batteries require ventilation or specific clearances. Blocking vents or sealing a compartment can create hazards or shorten service life. Follow the requirements for the exact battery chemistry and model.
Salt and moisture can damage exposed connections without entering the battery. Inspect terminals and cables, use approved protection, and replace corroded or damaged parts rather than covering up a faulty connection.
A product with a higher water rating may still be wrong for the boat if its chemistry, capacity, starting capability, charging profile, vibration tolerance, or dimensions do not match the system. Verify all critical specifications before purchase.
An enclosure cannot compensate for flooding, trapped water, incorrect ventilation, or unsafe wiring. Improve drainage and mounting position first, then use a suitable enclosure as an additional layer of protection when approved.
The battery is designed for the intended starting, deep-cycle, or dual-purpose use.
Voltage, capacity, chemistry, dimensions, and terminal layout match the boat and charging system.
The manufacturer states the water protection rating and explains which parts it covers.
The rating and installation instructions fit the actual exposure, including spray, washdown, or possible standing water.
Terminals, cable entries, fuses, and connectors have suitable protection for their location.
Mounting, ventilation, temperature, and charging instructions can be followed in the planned compartment.
The seller or manufacturer has clarified any unclear immersion claims in writing.
For most boats, the safest approach is to keep a Marine Battery secured in a dry, suitable compartment and prevent water from reaching its electrical connections. Select an IP rating only after assessing exposure, and never use a rating as a substitute for correct installation and maintenance. Review the product documentation and ask MATELION or the battery manufacturer for guidance when the exposure or rating is uncertain. A well-matched Marine Battery is one chosen for the whole marine electrical system, not just a waterproof claim.
Previous: None
Next: How to Select a Marine Battery Supplier for OEM Projects
How Waterproof Does a Marine Battery Need to Be?
Nov. 02, 2026
How to Select a Marine Battery Supplier for OEM Projects
Nov. 02, 2026
What Certifications Should a Marine Battery Have?
Nov. 02, 2026
How to Extend 18650 Cell Lifespan?
Sep. 22, 2026
What Are the Advantages of Lithium Marine Batteries?
Sep. 22, 2026